

Set up email on Android
Your business mailbox on your phone. You have two options, pick one. You only ever tap where the pink marker is.
- Thunderbird (Recommended) — A free app that sets itself up almost on its own. You only enter your address and password. The easiest way. → Part A
- Gmail — Already on most Android phones. A little more tapping, and one server value has to be corrected by hand. → Part B
With Thunderbird
Section titled “With Thunderbird”Five steps, about two minutes.
-
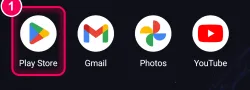
Install Thunderbird. Open the Play Store, tap the search bar at the top, type Thunderbird, and tap Install on the app with the blue bird. Then tap Open.
-
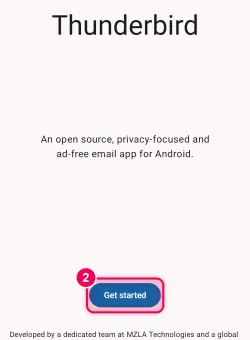
Tap “Get started”. When you first open it, Thunderbird welcomes you. Tap “Get started” at the bottom.
-
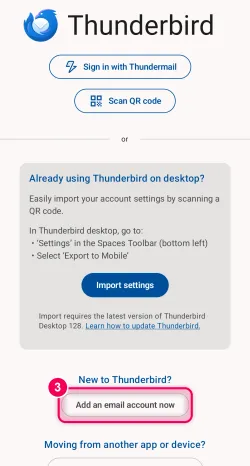
“Add an email account now”. At the very bottom you will see “Add an email account now”. Tap it. You do not need the buttons at the top.
-
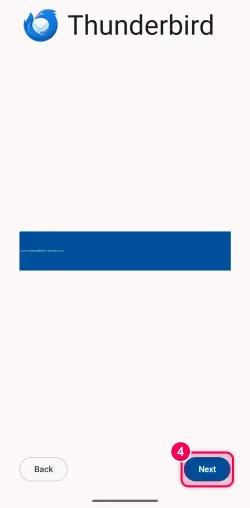
Enter your email address, “Next”. Enter your full email address and tap “Next” at the bottom right.
-
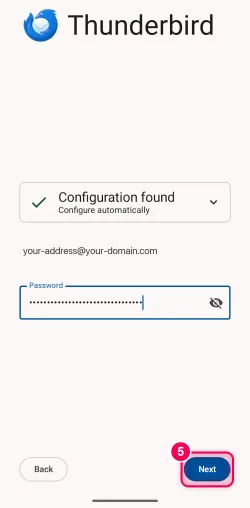
Enter your password, done. Thunderbird shows “Configuration found” with a green check mark: the settings come from us automatically. Just enter your mailbox password and tap “Next”. Your mailbox opens, and from now on your emails are in Thunderbird.
With Gmail
Section titled “With Gmail”If you would rather use the Gmail app you already have.
-
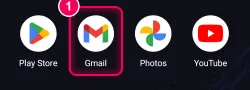
Open Gmail. Tap the Gmail icon. If an account is already there, tap your profile picture at the top right and then “Add another account”.
-
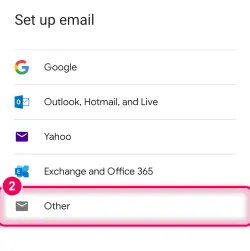
Choose “Other”. The “Set up email” list appears. Choose “Other” at the very bottom, not Google, GMX, or T-Online.
-
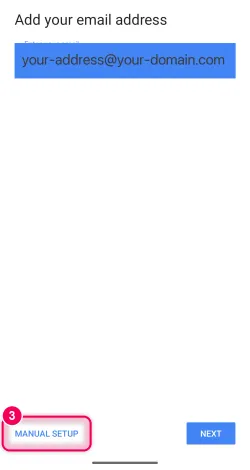
Enter your address, “MANUAL SETUP”. Enter your email address and tap “MANUAL SETUP” at the bottom left, not “NEXT”.
-
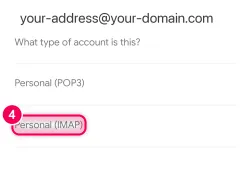
Choose “Personal (IMAP)”. When asked for the account type, tap “Personal (IMAP)”.
-
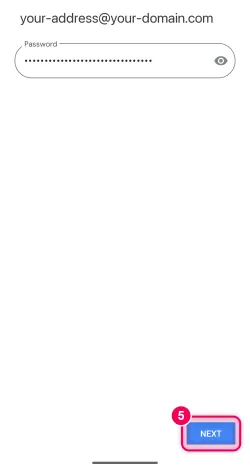
Enter your password, “NEXT”. Enter your mailbox password and tap “NEXT”.
-
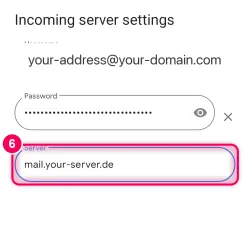
Change the server to “mail.your-server.de”. Gmail fills in the wrong server here at first. Clear the contents of the server field and type mail.your-server.de into it. Then tap “NEXT”. After that Gmail asks about the outgoing server too; the values are below.
The Gmail values at a glance
Section titled “The Gmail values at a glance”| Server | Port | Security | |
|---|---|---|---|
| Incoming (IMAP) | mail.your-server.de | 993 | SSL/TLS |
| Outgoing (SMTP) | mail.your-server.de | 465 | SSL/TLS |
The user name is always your full email address. For outgoing mail, “Require sign-in” must be on.