

Set up email on your Mac
In seven steps your business mailbox is in the Mail app. It takes about two minutes. You only ever click where the pink marker is.
-
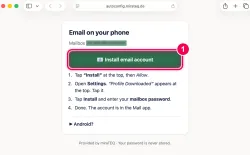
Click the green button. Open the link we sent you and click the green button “Install email account”.
→ Safari asks the next question straight away.
-
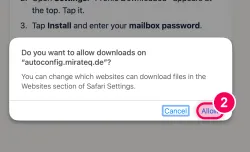
Click “Allow”. Safari asks whether the page may download something. Click “Allow”.
→ The file is downloaded. Nothing else appears to happen yet.
-
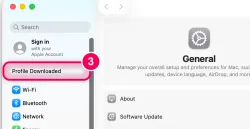
Open System Settings, click “Profile Downloaded”. Open System Settings (the grey gear in the Dock). At the very top of the sidebar there is now a new entry, “Profile Downloaded”. Click it.
→ Unlike on the iPhone, the window does not open by itself. You have to open it.
-
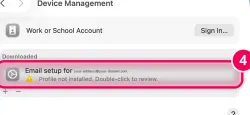
Double-click the entry. You can now see your downloaded profile. Double-click it.
→ The yellow triangle next to it only means “not installed yet”. That is fine — installing it is exactly what you are doing now.
-
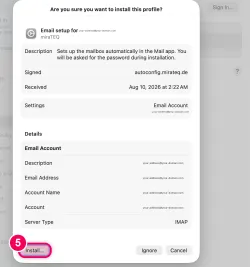
Click “Install…”. Your Mac shows what the profile sets up and asks for confirmation. Click “Install…” at the bottom left.
→ Only the password is missing now.
-
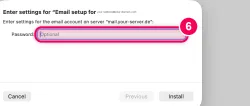
Enter your mailbox password, then click “Install”. Enter the password of your email mailbox — not your Mac password. Then click “Install” at the bottom right.
→ Your Mac checks the password with the server. If it is wrong, it tells you right away.
-
Finished. Your profile is now listed under “User” instead of “Downloaded”, and the yellow triangle is gone. Your mailbox is in the Mail app. Open it and your email is there.
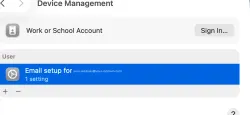
Want to remove the account again? System Settings › General › Device Management › select the profile › minus sign.