

Put the ordering app in your Dock on a Mac
Eleven steps and your ordering panel sits in the Dock as a program of its own, with new orders arriving straight away. You only ever click where the pink marker is.
-
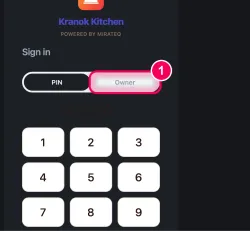
Switch to “Owner”. Sign-in starts on the PIN keypad your staff use. Click “Owner” at the top.
→ The keypad is replaced by a password field.
-
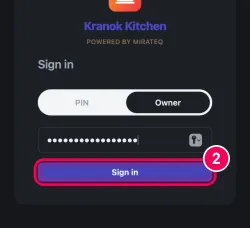
Enter your password and sign in. Type your owner password and click “Sign in”.
→ Your panel opens.
-
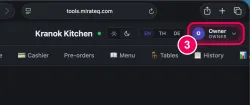
Click your name, top right. Click your name in the top right corner.
→ A small menu opens.
-
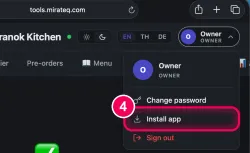
Click “Install app”. In the menu, click “Install app”.
→ A note explains the next two steps.
-
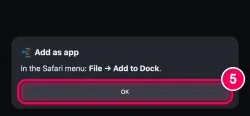
Click “OK”. Read the note and click “OK”.
-
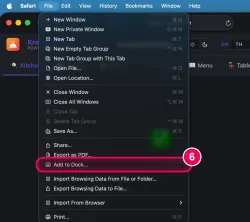
File → “Add to Dock”. In the menu bar at the top, click “File” and then “Add to Dock…”.
→ If the entry is greyed out, click once inside the panel window and open the menu again.
-
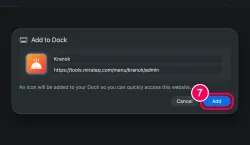
Confirm with “Add”. The window shows the name of your venue. Click “Add”.
→ The program now sits in the Dock at the bottom.
-
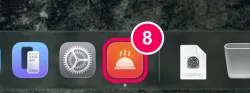
Click the new icon. Click the new icon in the Dock at the bottom.
→ The panel opens in a window of its own, without a browser bar. That is where you open it from now on.
-
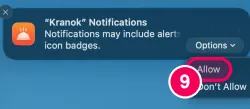
“Options”, then “Allow”. In the top right corner, macOS asks whether the program may send you notifications. Move the mouse onto it, click “Options” and then “Allow”.
→ Without this permission it stays quiet later on, no matter what else you switch on.
-
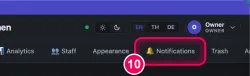
Open “Notifications”. In the tab bar at the top, click “🔔 Notifications”. If you cannot see the tab, push the bar to the left with two fingers.
-
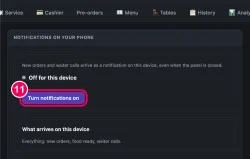
Switch it on. Click the “Turn notifications on” button.
→ Done. New orders and waiter calls now reach this Mac straight away, even when the panel is closed.
That’s it.